Tips on RTL Design (TailwindCSS)
Mohanad Alrwaihy
May 28, 2023
249
0
Learning about RTL Styling is useful when working on a multiple-language website with different directions to apply the best possible CSS properties so the style of the website looks great on both versions.
9 min read
Most languages in the world are written from left to right (LTR) and this includes all languages using the Latin alphabet like English and that's why the default page direction in all browsers is set to LTR.
What is RTL (Right-to-left)?
Some languages are written from Right-to-left like Arabic, Hebrew, and Persian. To create Websites with these languages we need to change the default direction of the elements to be from Right-to-left and if we need need to develop websites for example with English and Arabic we need to write a lot of CSS in order to display the content correctly for each language since both have different directions.
Default HTML direction
The default attribute for the direction (dir) in HTML element is set to ltr to set the direction of the page from Left-to-right 👇
CSHTML<html lang="en" dir="ltr"></html>If we changed the dir in the html element to rtl all content on the page will switch from being Left-to-right to be in Right-to-left 👇
CSHTML<html lang="ar" dir="rtl"></html> Tip
Tip
There is another dir value that is useful to know about which is dir="auto" that can be used to let the browser decide which direction to use based on the content inside the element.
What will change?
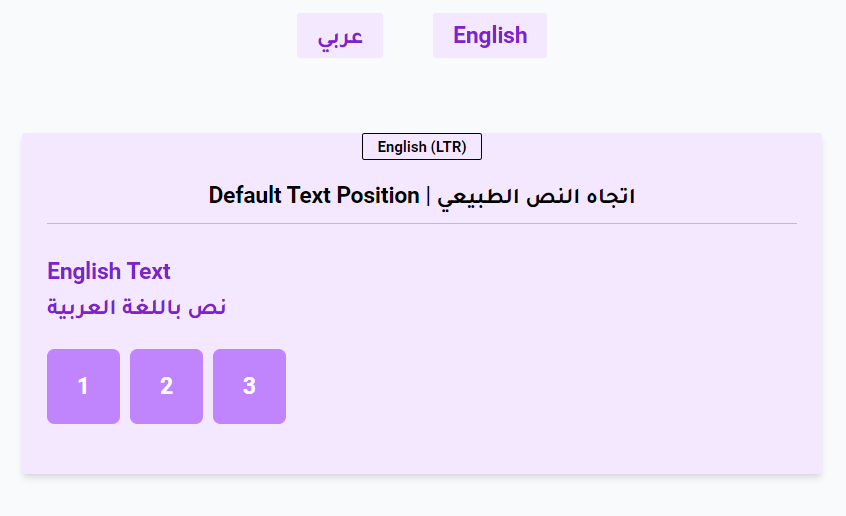
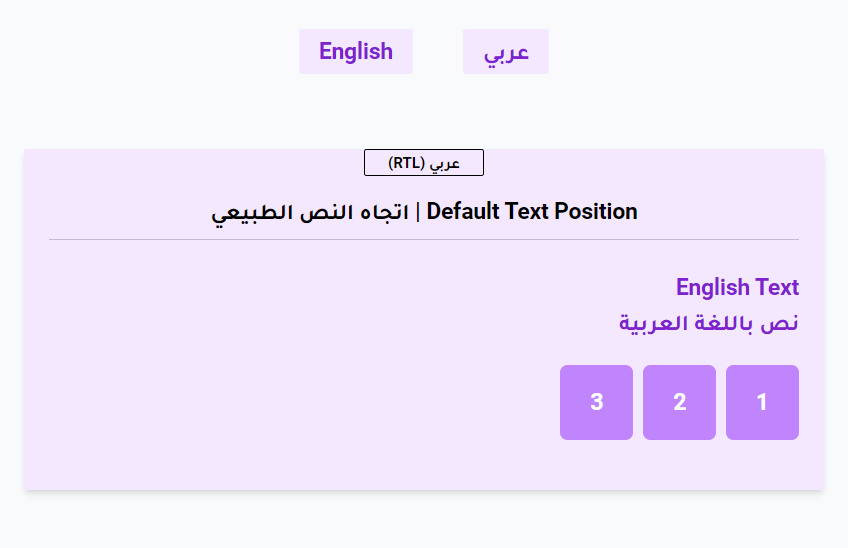
When changing the direction to rtl you will notice these changes happen on the page:
- Text Reverse side.
- Scrollbar switch to the right direction.
- Flexbox or grid items reverse rules.
Let's look at these differences:
LTR Direction
RTL Direction
Direction Differences 👇
Tailwind CSS RTL Support
In Tailwind CSS we can use the predefined modifiers for the element direction provided by Tailwind CSS to add style depending on the language conditionally.
We have two modifiers which are 👇
ltr- To apply styles when the page/element direction is Left-to-rightrtl- To apply styles when the page/element direction is Right-to-Left
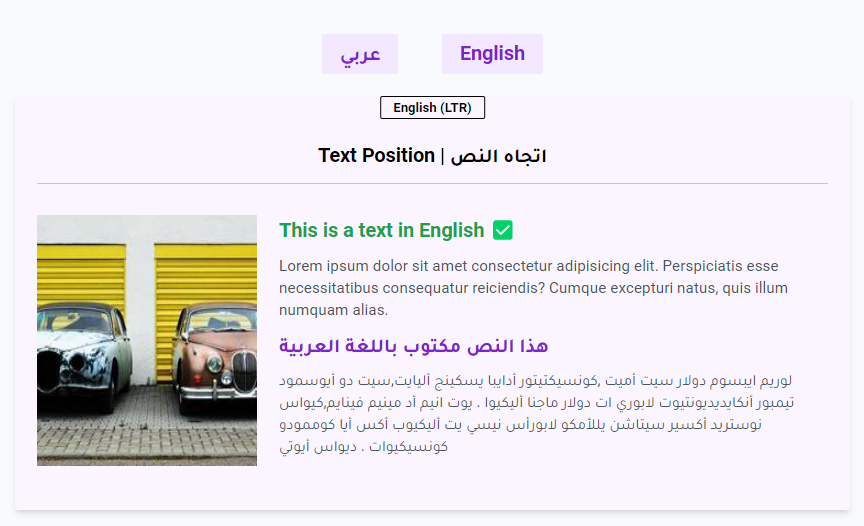
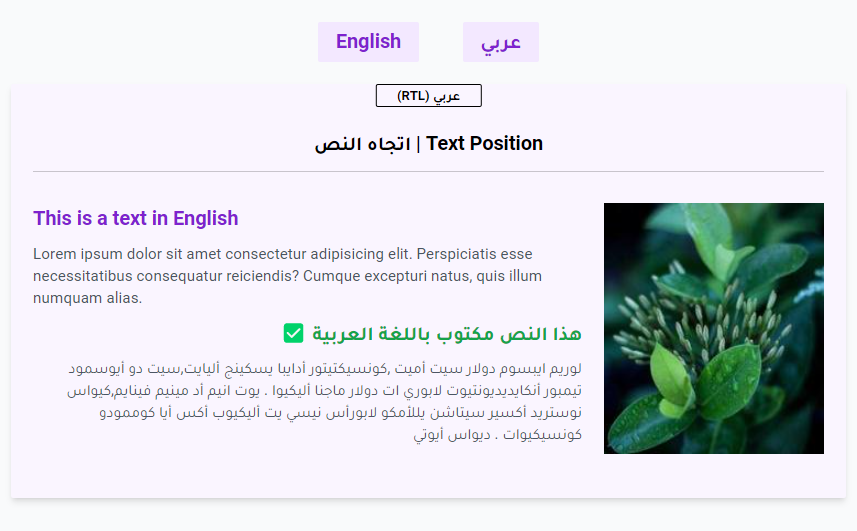
We can for example change the style of the English Text when the direction is set to ltr and the style of Arabic Text when the direction is set to rtl👇
CSHTML<p class="ltr:text-green-600 ltr:after:content-['✅']">
This is a text in English
</p>
<p class="rtl:text-green-600 rtl:after:content-['✅']">
هذا النص مكتوب باللغة العربية
</p>Try changing the language to change the direction to see yourself 👇
With these modifiers (ltr, rtl) we can change the style of any element in the page like applying margin to the left when LTR or a margin to the right when RTL 👇
ltr:ml-3- This will set margin-left value only when the direction is Left-to-right.rtl:mr-3- Set margin-right value when direction is Right-to-left.
Text Direction
We have multiple ways to determine the text direction of an element.
- Apply the
dirattributes directly to the element and choose betweenltr,rtl, orauto👇
CSHTML<p dir='ltr'>This is a text in English</p>
<p dir='rtl'>هذا النص مكتوب باللغة العربية</p>
<p dir='auto'>المزج بين ال English والعربي في الجملة</p> Warning
Applying the dir directly to an element should only be used when the content of the element is confirmed to stay in one language all the time or when the content can be a mix of words between two languages (use dir="auto") or the content itself can not be known in which language it will be even if the language is set on the website
- Change text direction using TailwindCSS utility classes 👇
text-left- Set to the left side of the container all the time.text-right- Set to the right side of the container all the timetext-start- Text will be on the start position depending on thedirvalue.text-end- Text will be on the end position depending on thedirvalue.
Example of Text Direction
Let's look at this example 👇
CSHTML<h3 class="ltr:text-green-600 ltr:after:content-['✅']">
This is a text in English
</h3>
<p class="text-gray-600 font-normal text-sm my-2">
Lorem ipsum dolor sit amet consectetur adipisicing elit.
Perspiciatis esse necessitatibus consequatur reiciendis? Cumque
excepturi natus, quis illum numquam alias.
</p>
<h3 class="rtl:text-green-600 rtl:after:content-['✅']">
هذا النص مكتوب باللغة العربية
</h3>
<p class="text-gray-600 font-normal text-sm my-2">
لوريم ايبسوم دولار سيت أميت ,كونسيكتيتور أدايبا يسكينج أليايت,سيت
دو أيوسمود تيمبور أنكايديديونتيوت لابوري ات دولار ماجنا أليكيوا .
يوت انيم أد مينيم فينايم,كيواس نوستريد أكسير سيتاشن يللأمكو
لابورأس نيسي يت أليكيوب أكس أيا كوممودو كونسيكيوات . ديواس أيوتي
</p>I will start with the first method which is to set the dir attributes of the headers to match the language and dir="auto" for paragraphs 👇
CSHTML<h3 dir="ltr" class="---">English</h3>
<p dir="auto" class="---">English</p>
<h3 dir="rtl" class="---">عربي</h3>
<p dir="auto" class="---">عربي</p>Text directions will be shown correctly now no matter what the page direction is!
We can also use TailwindCSS utility classes to fix this issue as well by settings text-left to English and text-right to Arabic or rtl:text-end for English and ltr:text-end to Arabic to change the direction to the end when the direction is the opposite. to Arabic to change the direction to the end when the direction is the opposite.
CSHTML<h3 class="--- text-left">English</h3>
<p class="--- rtl:text-end">English</p>
<h3 class="--- text-right">عربي</h3>
<p class="--- ltr:text-end">عربي</p>Letter Spacing - Link
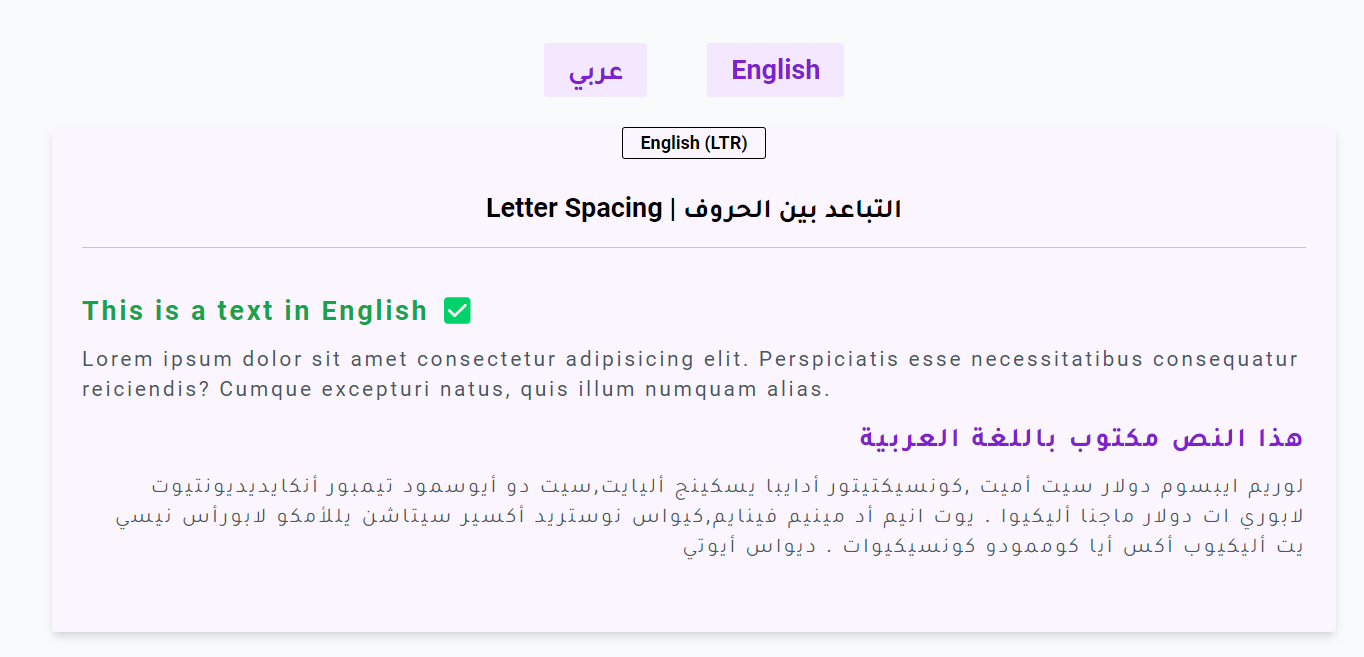
One of the differences between English and Arabic is that in English you can add letter-spacing to space letters but in Arabic, this is not possible since words are supposed to be connected to each other to form a word.
Adding Letter Spacing to the div container 👇
CSHTML <div class="py-5 tracking-widest">
<h3 class="---">English</h3>
<p class="---">English Lorem</p>
<h3 class="---">عربي</h3>
<p class="---">عربي لوريم</p>
</div>Look at this example when applying letter-spacing to the whole div 👇
The Arabic spacing is not correct and we should only apply spacing to the LTR Layout 👇
CSHTML<div class="py-5 ltr:tracking-widest">
<h3 class="---">English</h3>
<p class="---">English Lorem</p>
<h3 class="---">عربي</h3>
<p class="---">عربي لوريم</p>
</div> Tip
Tip
If the content in the container is set to be in English when dir="ltr" and in Arabic when dir="rtl" the above adjustments will work perfectly and we don't need to modify anything.
Since the content inside the div element is fixed now and contains English and Arabic we can fix this issue by adding spacing only on the English elements 👇
CSHTML<div class="py-5">
<h3 class="--- tracking-widest">English</h3>
<p class="--- tracking-widest">English Lorem</p>
<h3 class="---">عربي</h3>
<p class="---">عربي لوريم</p>
</div>Look at the example 👇
Line Height - Link
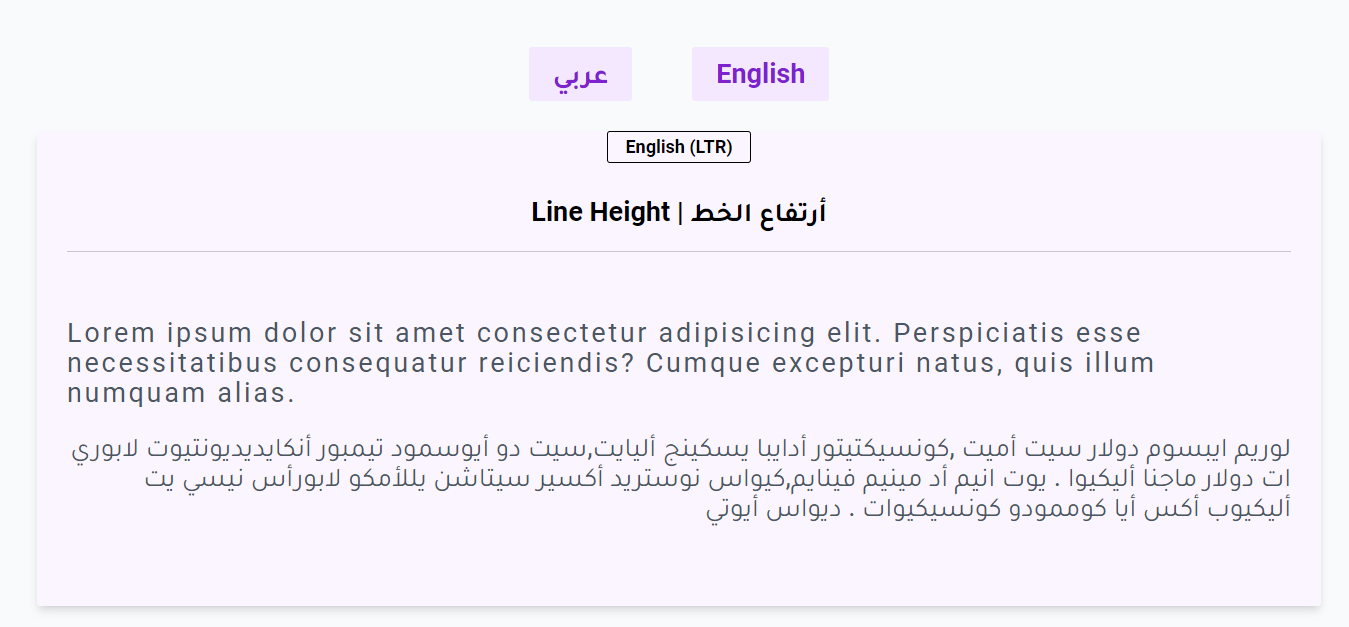
When styling the Line Height for LTR Layout you might settle for a Line Height that works great in English but make sure that the Line Height works on the RTL Layout or increase it if necessary look at this example of adding leadgin-5 to both paragraphs which adds 1.25rem line-height 👇
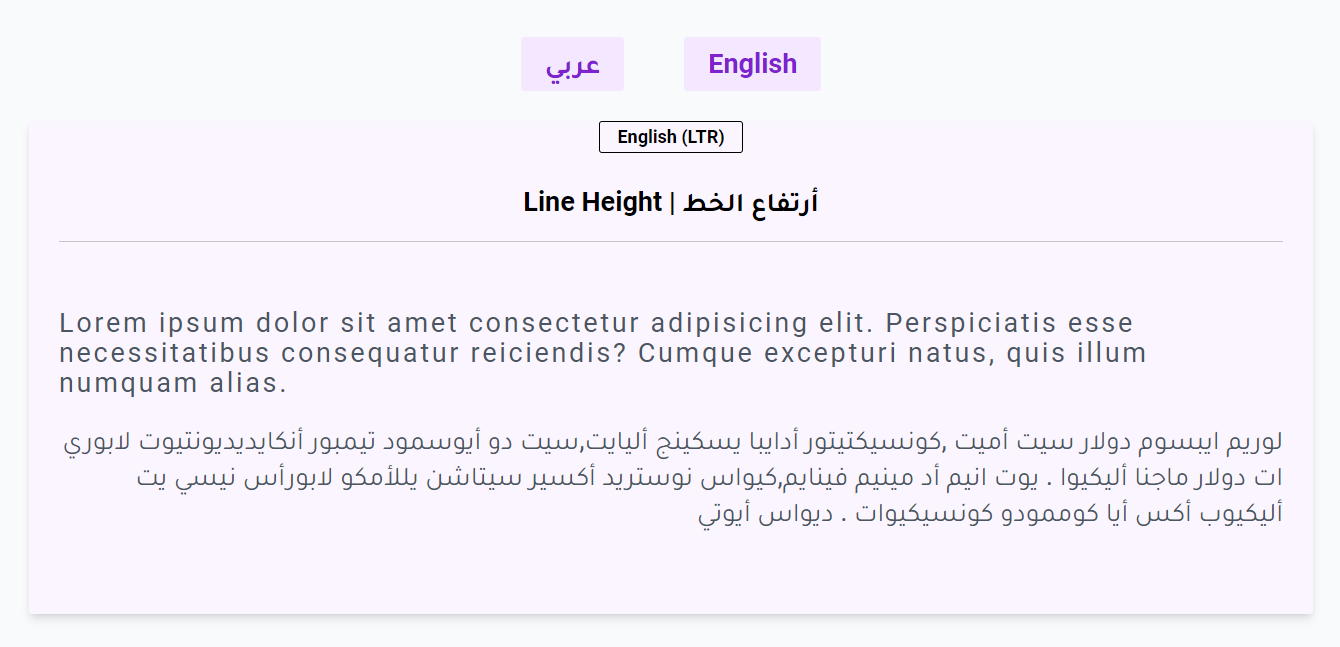
This might look good in English but it feels too close in Arabic so we have to increase line-height for the Arabic paragraph even more 👇
CSHTML<p class="--- leading-5 rtl:leading-6">
Lorem ipsum dolor sit amet consectetur adipisicing elit.
Perspiciatis esse necessitatibus consequatur reiciendis? Cumque
excepturi natus, quis illum numquam alias.
</p>
<p class="--- leading-6">
لوريم ايبسوم دولار سيت أميت ,كونسيكتيتور أدايبا يسكينج أليايت,سيت
دو أيوسمود تيمبور أنكايديديونتيوت لابوري ات دولار ماجنا أليكيوا .
يوت انيم أد مينيم فينايم,كيواس نوستريد أكسير سيتاشن يللأمكو
لابورأس نيسي يت أليكيوب أكس أيا كوممودو كونسيكيوات . ديواس أيوتي
</p>Line Break - Link
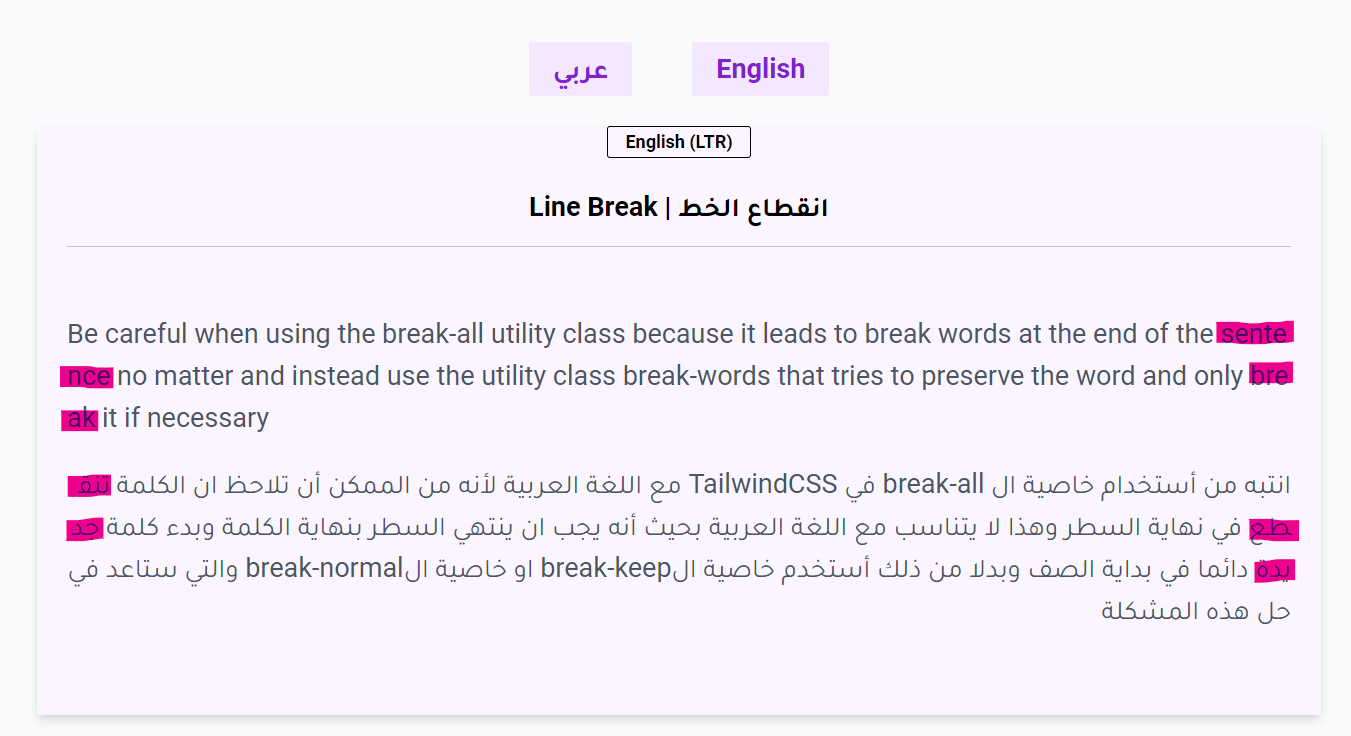
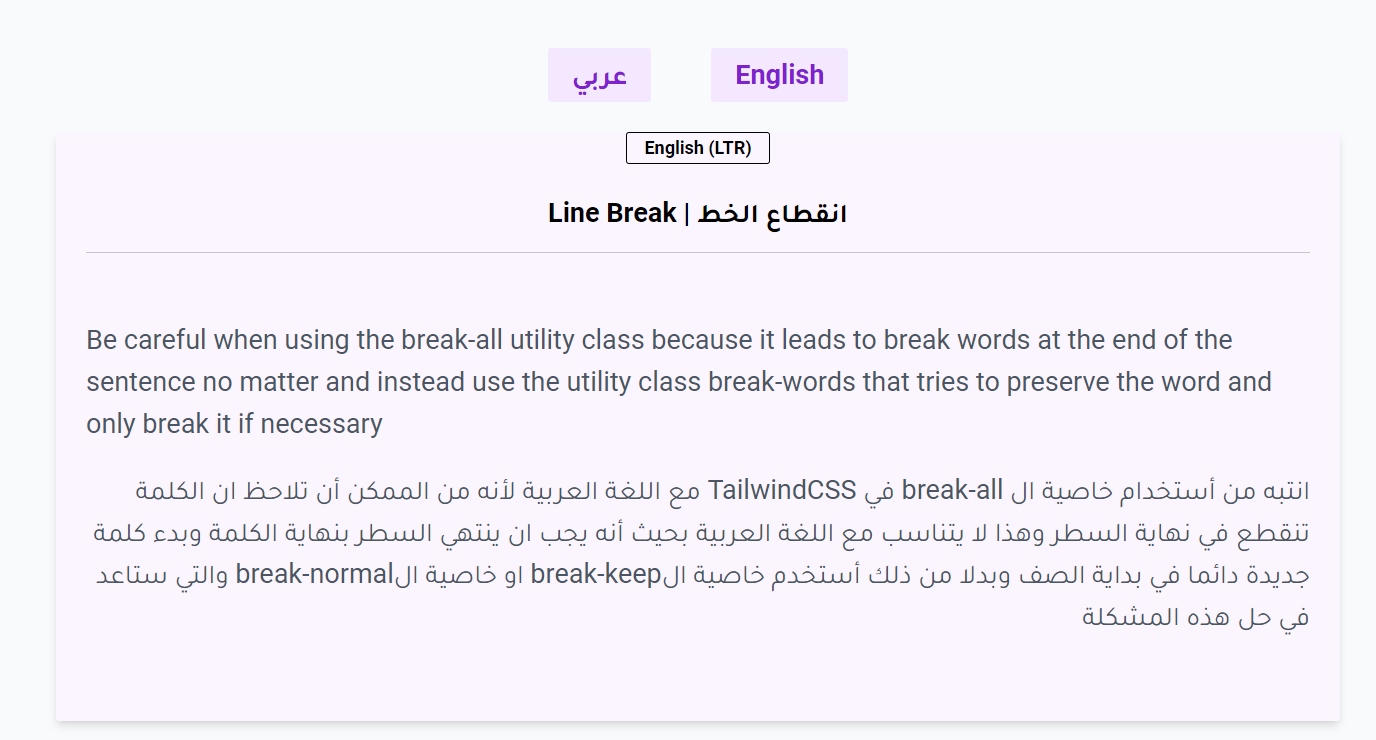
Be careful when using the utility classes for Word Break and make sure that the RTL Layout words do not break at the end of the line see this example code to apply word break 👇
CSHTML <div class="py-5">
<p class="--- break-all">
Be careful when using the break-all utility class because
it leads to break words at the end
of the sentence no matter and instead use the utility class break-words that tries to preserve the word
and only break it if necessary
</p>
<p dir='auto' class="--- break-all">
انتبه من أستخدام خاصية ال break-all في TailwindCSS
مع اللغة العربية لأنه من الممكن أن تلاحظ ان الكلمة تنقطع في نهاية السطر
وهذا لا يتناسب مع اللغة العربية بحيث أنه يجب ان ينتهي السطر بنهاية الكلمة
وبدء كلمة جديدة دائما في بداية الصف وبدلا من ذلك أستخدم خاصية الbreak-keep او خاصية الbreak-normal
والتي ستاعد في حل هذه المشكلة
</p>
</div>The break-all utility class used in the paragraphs above will lead to breaking words immediately without trying to preserve the words in the end.
To fix this problem we can use break-words for English which going to try to preserve the words before breaking them and for Arabic we can use either break-normal or break-keep which behave like the normal state and break words at normal break points.
CSHTML<div class="py-5">
<p class="--- break-words">
Be careful when using the break-all utility class because
it leads to break words at the end
of the sentence no matter and instead use the utility class break-words that tries to preserve the word
and only break it if necessary
</p>
<p dir='auto' class="--- break-keep">
انتبه من أستخدام خاصية ال break-all في TailwindCSS
مع اللغة العربية لأنه من الممكن أن تلاحظ ان الكلمة تنقطع في نهاية السطر
وهذا لا يتناسب مع اللغة العربية بحيث أنه يجب ان ينتهي السطر بنهاية الكلمة
وبدء كلمة جديدة دائما في بداية الصف وبدلا من ذلك أستخدم خاصية الbreak-keep او خاصية الbreak-normal
والتي ستاعد في حل هذه المشكلة
</p>
</div>Logical Properties
TailwindCSS supports a handful amount of utility classes for Logical Properties that make styling a Website that supports multiple languages easier.
Text Align (Link)
We have talked about the Text Logical Properties in the Text Direction section and Showed the difference between the directional properties and logical properties.
Directional:
text-left- Set text to the left direction.text-rigth- Set text to the right direction.
Logical:
text-start- Set text to the start direction.text-end- Set text to the end direction.
Margin (Link)
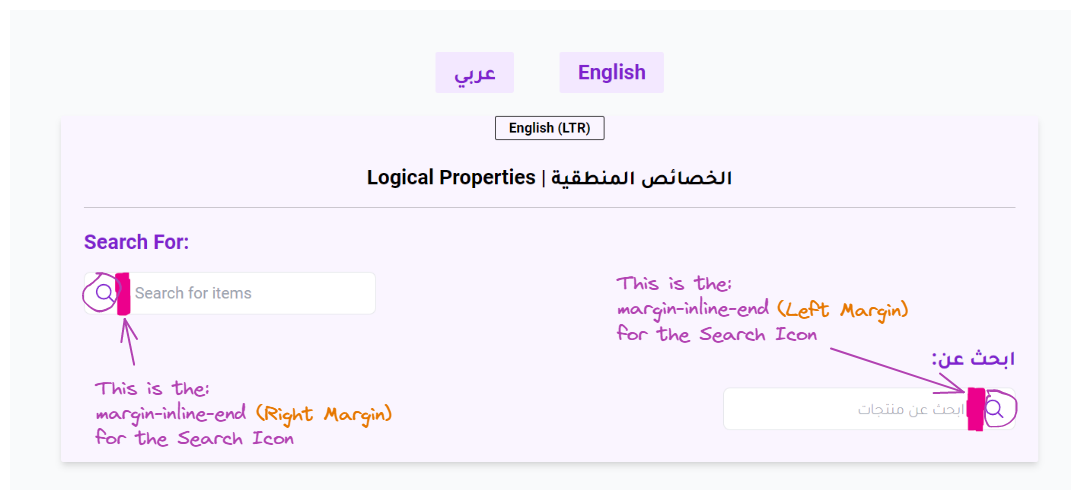
Applying margin with Logical properties is very useful when we want to add space at the start of a container or the end when the direction is reversed this can be used to add margin at the end of the input bar icon for example 👇
CSHTML <!-- Search Icon -->
<div class="w-5 h-5 me-4">
<svg fill="none" stroke="currentColor" stroke-width="1.5" viewBox="0 0 24 24" xmlns="http://www.w3.org/2000/svg" aria-hidden="true">
<path stroke-linecap="round" stroke-linejoin="round" d="M21 21l-5.197-5.197m0 0A7.5 7.5 0 105.196 5.196a7.5 7.5 0 0010.607 10.607z"></path>
</svg>
</div>Directional:
ml-1- Add a margin of 0.25rem (4px) to the left.mr-1- Add a margin of 0.25rem (4px) to the right.
Logical:
ms-1- Add a margin of 0.25rem (4px) at the start.me-1- Add a margin of 0.25rem (4px) at the end.
Padding (Link)
Applying extra padding at the start or the end depending on the direction. Can be used like the Margin to extra padding at the start or end of an element.
Directional:
pl-1- Add a padding of 0.25rem (4px) to the left.pr-1- Add a padding of 0.25rem (4px) to the right.
Logical:
ps-1- Add a padding of 0.25rem (4px) at the start.pe-1- Add a padding of 0.25rem (4px) at the end.
Border (Link)
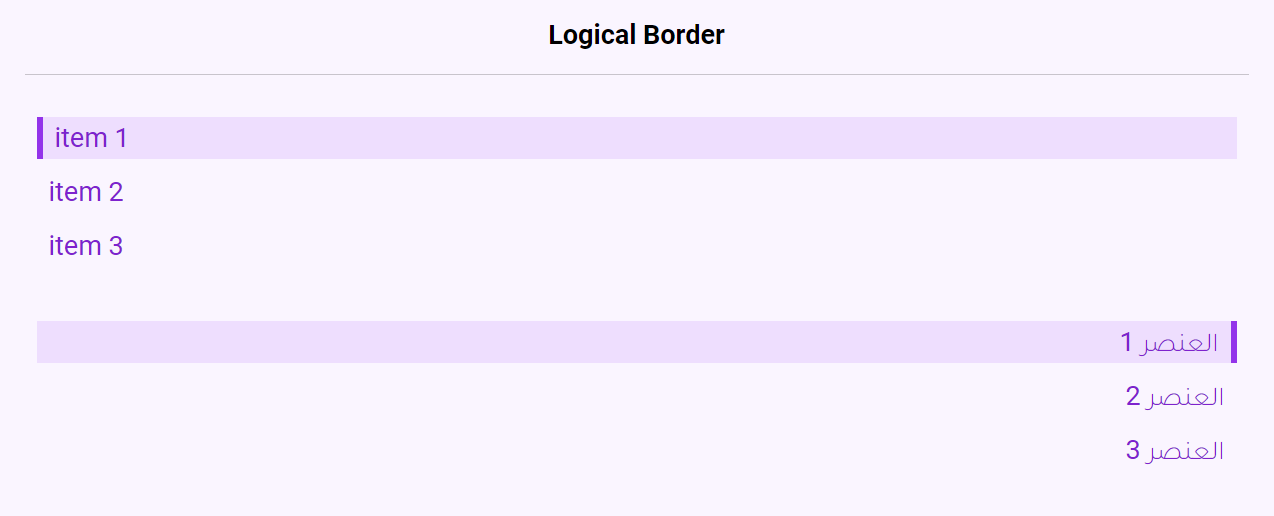
Using Border Logical properties is useful when trying to have a border showing on the left or right depending on the direction of the page like this 👇
CSHTML <nav>
<ul class="flex flex-col gap-2 font-light p-2 my-5">
<li class="border-s-4 ps-2 inline-block bg-purple-400/20 border-purple-600">item 1</li>
<li class="hover:border-s-4 ps-2 inline-block hover:bg-purple-400/20 border-purple-600">item 2</li>
<li class="hover:border-s-4 ps-2 inline-block hover:bg-purple-400/20 border-purple-600">item 3</li>
</ul>
</nav>
<nav dir='rtl'>
<ul class="flex flex-col gap-2 font-light p-2 my-5">
<li class="border-s-4 ps-2 inline-block bg-purple-400/20 border-purple-600">العنصر 1</li>
<li class="hover:border-s-4 ps-2 inline-block hover:bg-purple-400/20 border-purple-600">العنصر 2</li>
<li class="hover:border-s-4 ps-2 inline-block hover:bg-purple-400/20 border-purple-600">العنصر 3</li>
</ul>
</nav>We have combined padding and border logical properties in this example ps-2 , border-s-4 to add extra padding before the item text and having the border at the start direction 👍
Directional:
border-l- Add a border of 1px to the left.border-r- Add a border of 1px to the right.
Logical:
border-s- Add a border of 1px at the start.border-e- Add a border of 1px at the end.
Border Radius (Link)
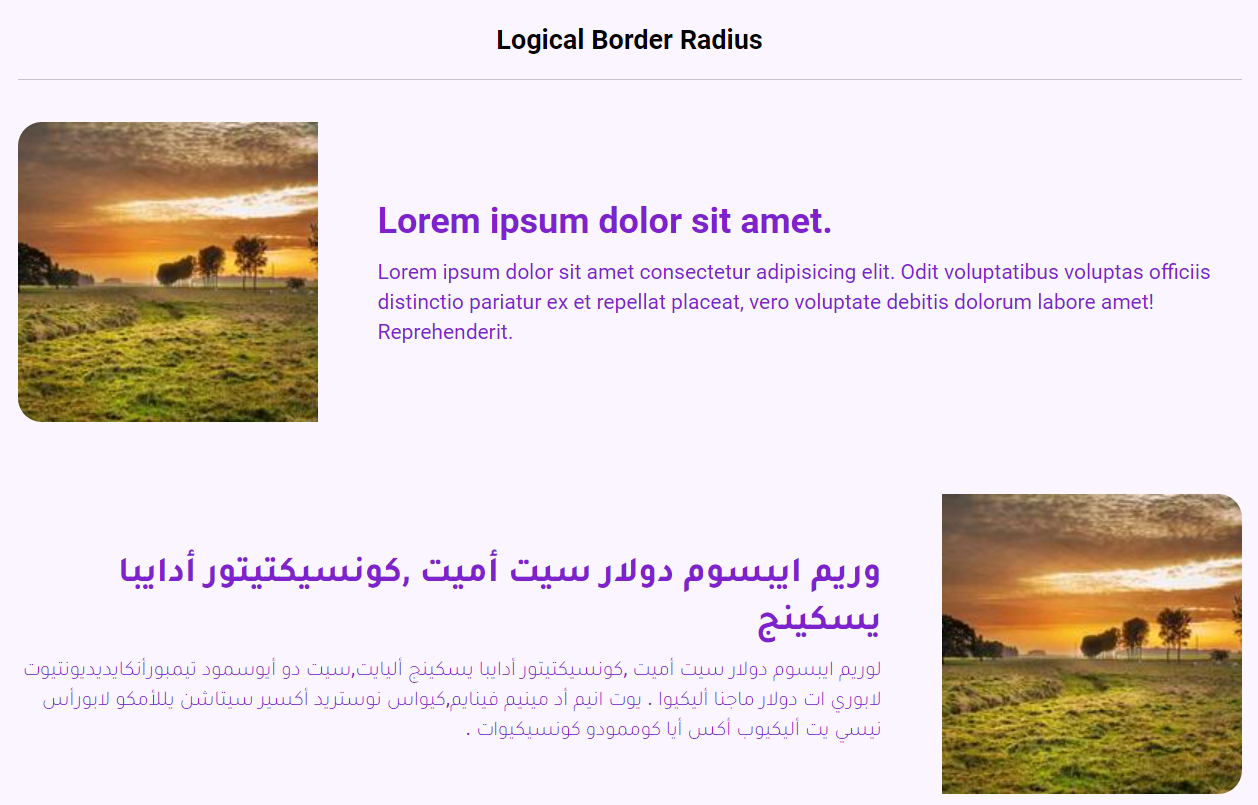
The border-radius logical property is useful as well to add for example a rounded edge for a picture on one side and reverse the rounded edge when the direction is changed 👇
CSHTML <div class="rounded-md font-light flex items-center gap-10 font-normal">
<img class="my-5 rounded-s-2xl" src="https://picsum.photos/id/110/200" alt="Picture Example">
<div>
<h3 class="font-bold text-2xl mb-2">---</h3>
<p class="font-light text-sm">---</p>
</div>
</div>
<div dir='rtl' class="rounded-md font-light flex items-center gap-10 font-normal">
<img class="my-5 rounded-s-2xl" src="https://picsum.photos/id/110/200" alt="Picture Example">
<div>
<h3 class="font-bold text-2xl mb-2">---</h3>
<p class="font-light text-sm">---</p>
</div>
</div>By just adding rounded-s-2xl we have added these two properties:
border-start-start-radius: 1rem; /* 16px */border-end-start-radius: 1rem; /* 16px */|
Directional:
rounded-tl- Add border radius of 0.25rem (4px) to the Top Left Cornerrounded-br- Add border radius of 0.25rem (4px) to the Bottom Right Corner
Logical:
rounded-ss- Add border radius of 0.25rem (4px) to the Start-Start Corner- LTR => Top Left
- RTL => Top Right
rounded-ee- Add border radius of 0.25rem (4px) to the End-End Corner- LTR => Bottom Right
- RTL => Bottom Left
